
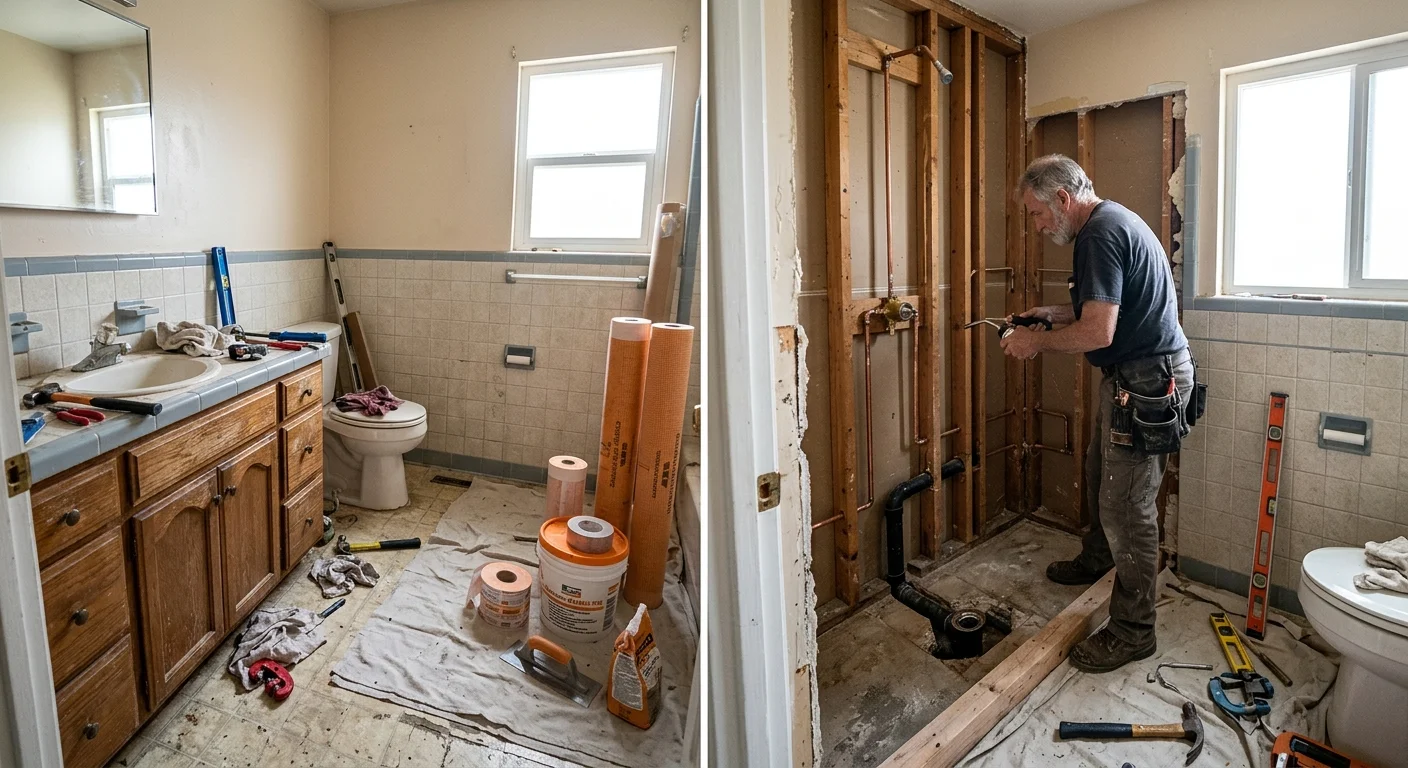
A successful Oceanside tub-to-shower conversion begins behind the finished surfaces. The alcove, drain path, wall framing, and waterproofing determine which shower designs make sense. Sorting out those conditions first prevents a simple bathroom update from becoming a string of costly changes.
Oceanside tub-to-shower conversion starts with the alcove
The alcove sets the boundaries for every decision that follows. In an older Oceanside tract home, the bathtub may sit between a back wall and two side walls. Those walls can look straight while hiding uneven framing, old repairs, or plumbing that enters from an unexpected direction.
We start by studying the whole enclosure, not just the tub. Wall depth affects the shower valve and trim. The opening affects the glass plan. The floor beneath the tub affects the shower base. A window, niche, or plumbing access panel can also change how the walls get rebuilt.
Demolition provides the first honest look at these conditions. Once the tub and wall finish are removed, we can inspect the framing, plumbing, and subfloor or slab around the alcove. We can then separate cosmetic work from repairs that belong inside the project.
The alcove also guides material choices. A prefabricated shower base needs a compatible footprint and drain position. A site-built shower offers more layout flexibility, but it requires a complete slope and waterproofing plan. Tile size matters too. Large pieces can expose crooked walls, while small pieces create more grout joints.
This is why our bathroom remodeling work starts with the room itself. A product photo can inspire the look, but it can’t reveal what’s behind an Oceanside bathroom wall. The right design fits the actual opening and the way the home was built.
How drain location changes the demolition
The drain route determines how much of the floor needs to open. A tub drain usually sits near one end of the alcove. A new shower base may place its outlet elsewhere, depending on the selected system and layout.
Sometimes the new base can work with a drain near the existing location. Other designs call for a centered or offset drain. Moving it may require access through a framed floor or work within a slab. Those are different construction problems, so the drain decision needs to happen before materials are ordered.
Floor framing deserves special care. A drain can’t be routed wherever it looks best without considering joists, supports, and the needed slope. Cutting structural members to force a convenient path can create a larger problem. We plan the plumbing route around the home’s structure.
The valve location deserves the same attention. Keeping it on the existing plumbing wall may reduce disruption, but comfort still matters. The controls should be reachable without forcing someone under the shower spray. A handheld fixture also needs a planned outlet, mounting point, and hose path.
This rough-in work happens before the walls close. We test the layout against the chosen shower base, wall thickness, and finished trim. A small measurement error behind the wall can leave a valve too deep, a handle too close to glass, or a drain that misses the base opening.
A tub-to-shower project should never treat plumbing as an afterthought. The visible fixtures are the final layer. Their positions depend on careful work below the floor and inside the wall.
Why wall backing and waterproofing come first
The shower’s lasting performance depends on what sits behind the tile. Tile and grout form the visible surface, but they aren’t the entire water-management system. The walls and base need a continuous assembly that directs water toward the drain.
We first make sure the wall planes suit the selected finish. Twisted or bowed framing can cause uneven tile, awkward corners, and glass installation problems. Correcting those surfaces while the alcove is open gives every later trade a better starting point.
Backing also needs to match the fixtures. A future grab bar, folding seat, handheld rail, or heavy glass panel needs solid support in the right location. Adding that support before waterproofing is straightforward. Discovering it after tile installation is not.
Penetrations receive special attention. The valve, shower arm, handheld outlet, niche, and any window transition interrupt the wall surface. Each opening must connect cleanly with the surrounding water-management system. Corners and the joint between the wall and shower base need the same coordinated treatment.
Ventilation belongs in this conversation because the shower changes how the room handles moisture. We inspect the existing exhaust setup and consider how air moves through the bathroom. A beautiful enclosure can still feel damp if moist air has nowhere useful to go.
Glass planning starts before the tile as well. The installer needs straight mounting surfaces and reliable backing where hardware meets the wall. Tile edges, benches, and half walls must account for the panel position. Waiting until the end can limit the door style or create unwanted filler pieces.
Oceanside’s coastal setting doesn’t make weak waterproofing more forgiving. We build the hidden layers as carefully as the visible ones. Once the tile is installed, those layers become difficult to inspect or correct.
Where accessibility choices affect the layout
Accessibility choices work best when they shape the layout from the beginning. Entry height, standing space, controls, seating, and glass all compete for room inside the old tub footprint.
A curbed shower is often easier to coordinate with an existing floor. A lower entry may require changes to the floor assembly, drain position, and slope. A curbless design asks even more from those conditions. The bathroom floor and shower floor must meet without sending water into the room.
No entry style creates accessibility by itself. The user still needs comfortable movement, reachable controls, and a safe route through the opening. A bench can help one person and crowd another. A fixed glass panel can contain spray but narrow the entrance. A swinging door needs clearance outside the shower.
We ask how the bathroom will be used now and later. That conversation guides practical decisions. Wall backing can support grab bars where they’ll be useful. A handheld fixture can serve seated and standing users. The valve can be positioned near the entrance when the wall and plumbing allow it.
Glass should follow the water pattern and the user’s movement. An open design feels spacious, but the panel still needs to control spray. A door can offer more enclosure, yet its swing must avoid the vanity, toilet, and doorway. The showerhead direction matters here.
An older home bathroom remodel usually involves tradeoffs. The existing room may not support every preferred feature without broader floor or plumbing work. We explain those tradeoffs before construction, then build around the priorities that matter most to the homeowner.
What the bid should say before work starts
A useful bid describes the work behind the finished shower. It should do more than name tile, fixtures, and glass. The document should define assumptions, included work, exclusions, and how changes will be handled.
Look for clear language about these parts of the project:
- The demolition scope should identify which finishes and fixtures will be removed.
- The plumbing scope should describe the planned drain, valve, and fixture work.
- The wall scope should name the backing, waterproofing approach, and finish installation.
- The bid should explain how ventilation, glass, and accessories fit into the project.
- Allowances and exclusions should be written clearly before materials are selected.
Older bathrooms can reveal concealed damage or earlier repairs after demolition begins. The bid should explain how the contractor will document a newly discovered condition and price any added work before proceeding. That protects the decision-making process without pretending the wall has already been opened.
Product responsibility also needs clarity. Homeowner-supplied fixtures can affect compatibility, lead times, and warranty handling. Contractor-supplied materials should be identified with enough detail to compare the proposed work. A written, itemized estimate makes those differences easier to see.
Our guide to San Diego bathroom remodeling costs explains the choices that move a project budget. Drain relocation, framing repairs, tile selection, custom glass, ventilation, and accessibility features can all change the scope. The existing bathroom conditions matter as much as the desired finish.
Contractor selection matters too. Our bathroom remodel contractor guide covers practical ways to compare scope and communication. Homeowners can also verify any California contractor through the Contractors State License Board. The Rock Remodels is led by David Sanchez, a licensed California contractor, CSLB #1042918.
When to call us
Drain changes, concealed plumbing, wall rebuilding, waterproofing, and glass preparation belong with a licensed contractor. We can inspect the alcove and build a clear scope around your Oceanside bathroom. Call us at (760) 605-5002 for a free in-home estimate.